Paper Jet 14

Paper Jet 14
Hull#001 Built by Dudley Dix

Wednesday, January 1, 2014

Fairing the Hull

Had some time off between Christmas and New Years and the weather has been extremely pleasant! So it was a good opportunity to get the PaperJet down from the ceiling and start the fairing process. You would think that a a hard chined boat like this would not require a whole lot, but it turns out that you have to do some blending in of the fiber glass seam tape and the hull. In hind sight I should have used a 4" tape vs. 2" as specified in the instructions that way I could have had some room to blend the tape vs adding fairing material.


The other area that needed some work was the bow, so I applied a liberal amount of filler in that area so that I could get a uniform shape on both sides of the boat.


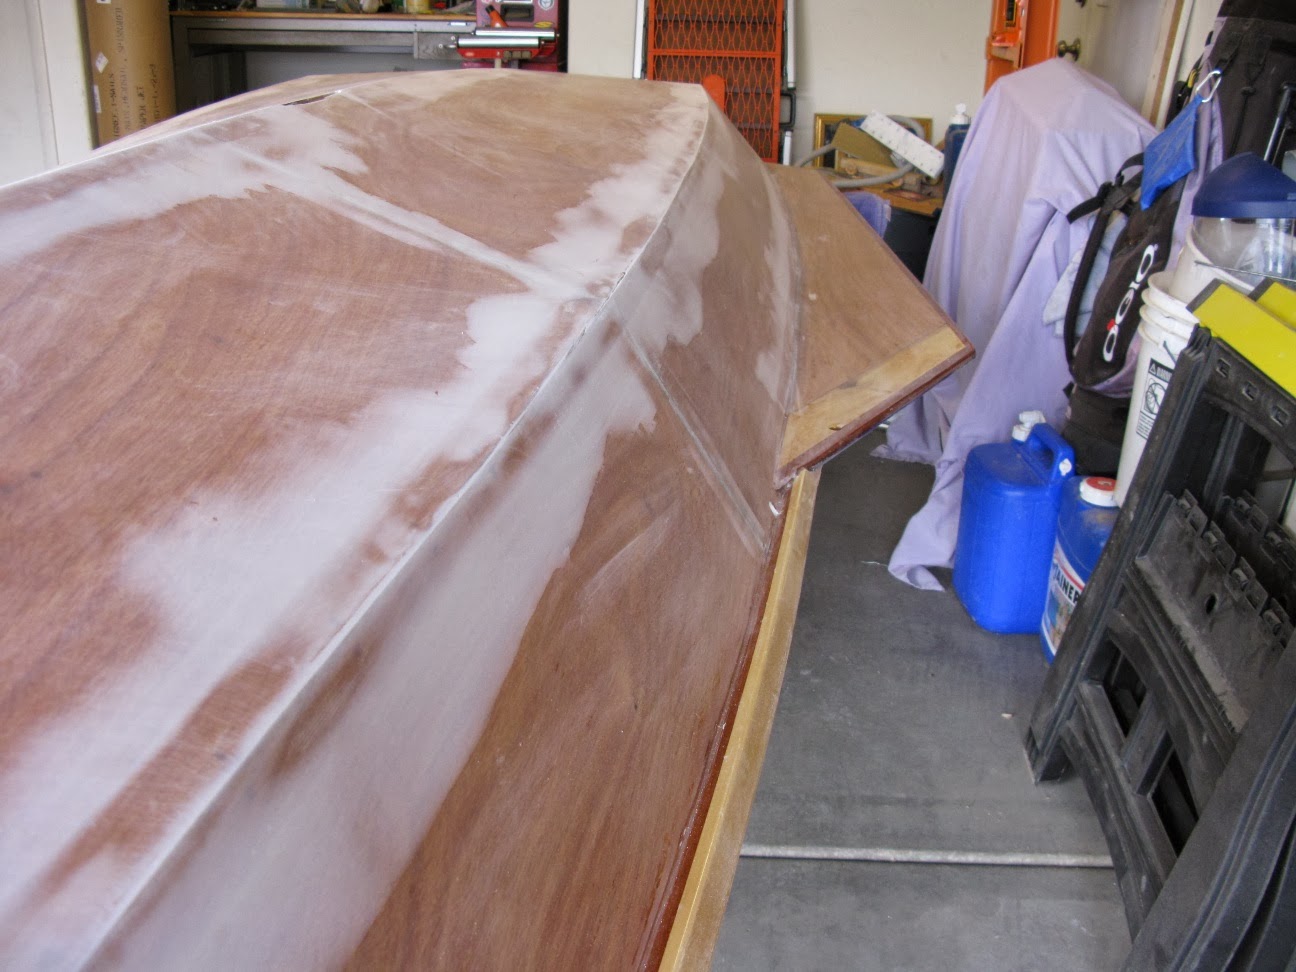
I spent a lot of time sanding down the fairing material and getting smooth with the hull. This initial fairing highlighted a few spots that needed additional work. Mainly I need to add some more material to the joint in the hull, and secondly I need to add some fairing material to the chine areas so that I get a nice consistent chine across the hull.


I was debating whether I would do a second round of fairing prior to primering the boat, but decided that I would be better off adding a coat of primer and doing the final touches of the fairing over the primer. I really had a couple of thoughts behind this. Firstly, Stan Sussman affectionally known as Paint Boy from Interlux suggested that it would be better to have a coat of primer under the fairing material. Secondly in my effort to blend the fairing material into the hull I was beginning to get a little thin on the clear epoxy coat!


I feel like some progress is being made now that I am seeing a primered hull!

Next step is to add some more fairing material, do some more sanding, and another coat of primer!

Sunday, November 3, 2013

Let's Get it Started!

Wow! It is hard to believe that it has been over 6 months since I last worked on the boat! You can really blame it on the re-fit of Tru Luff, my Catalina Capri 18, for a couple of summer ocean trips in California and the stinking hot Arizona summer!. Now that the temperatures are finally getting in the pleasant range I hope to finally finish this project! The first step was to finish sanding the hull in preparation for some fairing work and primering which I am glad to say I finished last weekend!


Hopefully next weekend I can start the fairing process!

Sunday, April 14, 2013

Primer coating of Deck Complete!

Finally finished primer coating the deck. I ended up applying 3 coats total. I tried a couple of different rollers and found that the best finish came with the sponge type roller vs the more traditional low nap "hair" type roller. The only downside with the sponge type roller is that the chemicals in the epoxy primer breaks down the material therefore you have to keep an eye on it and replace it once it starts getting somewhat limp!


Putting the blue painter's tape on it 3 different times was a bit of a pain, but worth it.


Overall it looks pretty good. There are some areas that could benefit from a little filler to smooth things out but most of them will ultimately end up under the non-skid therefore I'm not sure its worth the effort at this time.

I decided to wait on painting the deck until I sand the hull and primer/paint it. I'm pretty certain that there will be some vigorous sanding going on with the hull and there is no point in ruining the final finish!


We flipped the boat after the last coat dried and now it's time to start on the hull. Looks like another long sanding project to me!

Sunday, March 24, 2013

First Coat of Primer!

Last weekend I applies fairing epoxy to all of the low spots etc that I had on the deck, and I followed up this weekend by sanding the excess material off and getting the deck finalized for applying its first coat of primer.

I am using Interlux two part epoxy primer called Primekote. Prior to taping all the bright work I wiped the deck down with the recommended solvent to make sure there was no oils etc that would interfere with a good bond.

I used a roller to paint the bulk of the deck, and a brush to get in some of the tight places and the bottom of the cross deck. I must admit that the bottom of the cross deck has lots of nooks and crannies that are hard to get to!


After I was done with the first coat I took the tape off to make sure that it did not stick on permanently once the epoxy primer dries. I have always had less than good luck with painters tape being a pain to take off so I decided to take no chances.


The deck definitely needs a second coat but it is good to see some paint on the boat! I am hoping that I can get a second coat on this week, but realistically it will be next weekend.


Sunday, March 10, 2013

The Deck is Sanded!

So it's been a very long time since I dedicated time to working on this project. I had to get our Catalina 18 ready for a 9 day sailing trip in Lake Havasu during the middle of February that took a lot of time! After which we seemed to have one event after the other that was pulling me away from the boat.

So, after 3 months of not touching the boat, I put on my tyvex suit and went to work and finished sanding the deck this weekend! So she is now ready for some minor fairing prior to the primer going on!


I on purpose did not sand any of the bright work which I will do once I get ready to apply the finished coat to the deck. I must admit I am not a big fan of sanding epoxy! It is almost hard work!


Sunday, December 16, 2012

Let's get this project re-started - Again!

Well Mr. Procrastination has been alive and well as it comes to this project. I must admit that sanding epoxy is not the most entertaining thing to do and I have quite frankly put this part of the project off by finding other things to keep me busy! But, at some point in time I have to finish this and I am sad to say that this upcoming February will be 3 years since I started!

So first things first - about a month or so ago I had my wife help me take the boat off the stand at which point we both washed it down with soapy water to try to get some of the Amine residue off. This was suggested by our local Interlux rep. Once it was back on the stand it sat for a while!

Well this weekend it ended up raining all day Saturday and I figured it was the perfect opportunity to resurrect this project!


I ended up getting about two thirds of the deck sanded by the time I called it quits. I am using hand sanders since I am trying real hard not to break through the epoxy into the natural wood and power sanders seem to have a mind of their own at times! That being said I did have a couple of minor areas where I exposed the wood. I am thinking that since I am using an epoxy based primer that it might not be a huge deal.

My goal is to finish sanding the deck next weekend. Fingers crossed!

Sunday, October 14, 2012

Finishing the topside

The weather in Arizona is finally getting more conducive to working outside. Between last weekend and this weekend I finished sanding the hull in preparation for the laminating epoxy.

I also figured I might as well drill the holes for the shrouds prior to applying the epoxy. For this I used a 1/2" (13mm) forstner bit that did an acceptable job of drilling the hole. It's interesting to note that on the forward shrouds, the hole in the cross brace doesn't exactly line up very well in the up and down position with the hole in the hull (The holes were located per the instructions) We will have to see if this causes any issues when I install the shrouds and the mast.


I have had limited success so far in obtaining a good even coat when applying epoxy and I must admit that today was no different. I used a combination of a west systems roller and brush to tip it. And, even though  the roller did a good job of spreading the epoxy and minimizing runs,  I still ended up with brush marks on the first coat of epoxy. I guess do a light sanding and try again!


I will say that there is a ton of hard to reach places under the cross brace. I am hoping that I was able to get it all good in there! I'll make sure to really hit it good on the next coat.

My goal is to get a 2nd coat within the next day or so and then start the fairing / primering process on the deck.