Paper Jet 14

Paper Jet 14
Hull#001 Built by Dudley Dix

Monday, May 28, 2012

Back in the saddle again!

Wow! I cannot believe it has been almost two months since I last worked on the Paper Jet! I guess that is what  happens when you decide to buy a new (to me) sailboat out of the blue! I have been spending way to much time getting that boat up to snuff and have neglected the poor Paper Jet! Well this weekend it was time to change that.

The mission right now is to get the topside ready to epoxy and then finish. A few things have to happen in order to accomplish this.

Firstly I cut out the foot rests and the doublers for the wings where a couple of cleats attach.


I also cut out the spacers for the deckside dagger board locker and proceeded to find out that the dagger board did not want to fit through the spacers that I had previous epoxied to the bottom of the hull! (It is amazing what happens when you add several coasts of epoxy to stuff! They grow!) This necessitated doing some sanding on the dagger board and also on the hull spacers! I wasnt able to resolve the entire issue this weekend but it was getting close. I think it is time to start sanding down the dagger board for finishing so that I have the final size figured out.


I also spent a fair amount of time doing the initial sanding on the deck although I still have a fair amount of detail sanding to go. There is definitely a lot more nooks and crannies on the deck vs. the hull!


I finished up this weekend by epoxying the foot rests and piling a whole bunch of weight on it so that they would lay flat!

All in all a weekend of miscellaneous tasks where not a whole lot got accomplished but there was forward progress!


Sunday, April 1, 2012

Time to finish the Hull

This weekend I finally found the time to give the hull a final sanding with 220 grit sand paper prior to applying the epoxy coats.


I also went ahead and added the groove to the bow where the forestay attachment will eventually go. You will notice that the poplar cap has a distinct shape. It was the best I could come up with that would take care of all the interesting angles that meet up at the bow transom of the boat!


After everything was good I was able to put a couple of coats of epoxy on it. Interestingly I tried a different method of applying the epoxy - I poured the epoxy onto the hull then spread it with a squeegee while my wife followed up behind me with a wide brush to even everything out. It worked like a charm!


Next steps are to add one more coat of epoxy and then start the fairing process. I am hoping to have it faired by next weekend so I can start putting the primer coat on!

Sunday, March 18, 2012

Daggerboard Locker Spacers

Prior to epoxying / fairing the bottom of the hull it occurred to me that I better add the bottom spacers in the daggerboard locker that will keep the dagger board pointing true!

Originally my goal was to get the spacers built,  add 3 coats of epoxy and have them installed prior to this weekend. The thought was I could then finish the fine sanding on the hull and start the epoxy/fairing/primer process. Alas, the best laid plans of mice and men sometimes get waylaid and it occurred to me that I may not want to rush this process, since it is pretty critical that everything is lined up and true!

So, I had some poplar lying around in the shop and using my handy home made jig cut the spacers to size per plan. I then spent a fair amount time sanding/fitting them with the daggerboard installed in the boat, making sure that they were going to be a snug, yet not binding fit!

Once I ascertained that they were the correct size I rounded off the inside edges with the hopes that it will make installing the daggerboard in the boat  easier and guide them into the hole!


I added 3 coats of laminating epoxy


and installed them using some spare pieces of cedar as wedges to hold them in place.


Overall not too pretty, but once everything is epoxied, faired and primered it will look good!


My goal is now to finish sanding the hull with 220 grit paper and epoxy, fair, and primer the hull!

Saturday, March 3, 2012

Let's get back to the Hull

Well when the weather is conducive to both sailing and building a boat.. well sometime sailing has to take first place! A fabulous week @ Lake Havasu sailing and a corresponding weekend of both preparing prior and the cleaning up afterwards means that the Paper Jet has been sitting still for the last 3 weeks!

Prior to going on vacation I got the mast put up on the ceiling to keep it out of harms way. I figured it would not be a good idea to keep it in the mast jig on the floor anymore since was pretty much in harms way!


This morning I took apart the mast jig and cut it down to size so that it could act as supports for the saw horses for when I have the boat turned upside down. I also stapled some carpet strips I had to one of them and threw a couple of rugs on the other one to prevent them from scuffing up the hull now that I am entering the finishing process.

Today's plan was pretty simple. Firstly I wanted to clean up the wing caps and add a quarter round to them using the router.


Secondly I wanted to clean up the bottom of the gunwales and also add a quarter round to them also!


Finally I wanted to start the sanding process on the hull. My goal is to get the hull prepped, sanded and 3 coats of epoxy added prior to flipping it over and doing the same with the deck.


I finished sanding half the hull today, tomorrow I will tackle the other half!

Sunday, February 5, 2012

Mast is done!

Finally finished up the lower and top masts this weekend after applying the fourth coat of varnish! I must admit that I finally figured out the trick to applying the spar varnish. Again, it's all about putting on just the right amount of varnish on your brush and on the spar....


It actually turned out quite nice!

Next steps will be fill in the screw holes and hang this up on my ceiling. Once out of the way it will be time to get the hull down and start the final work on it.

Friday, January 20, 2012

Mast attachment points

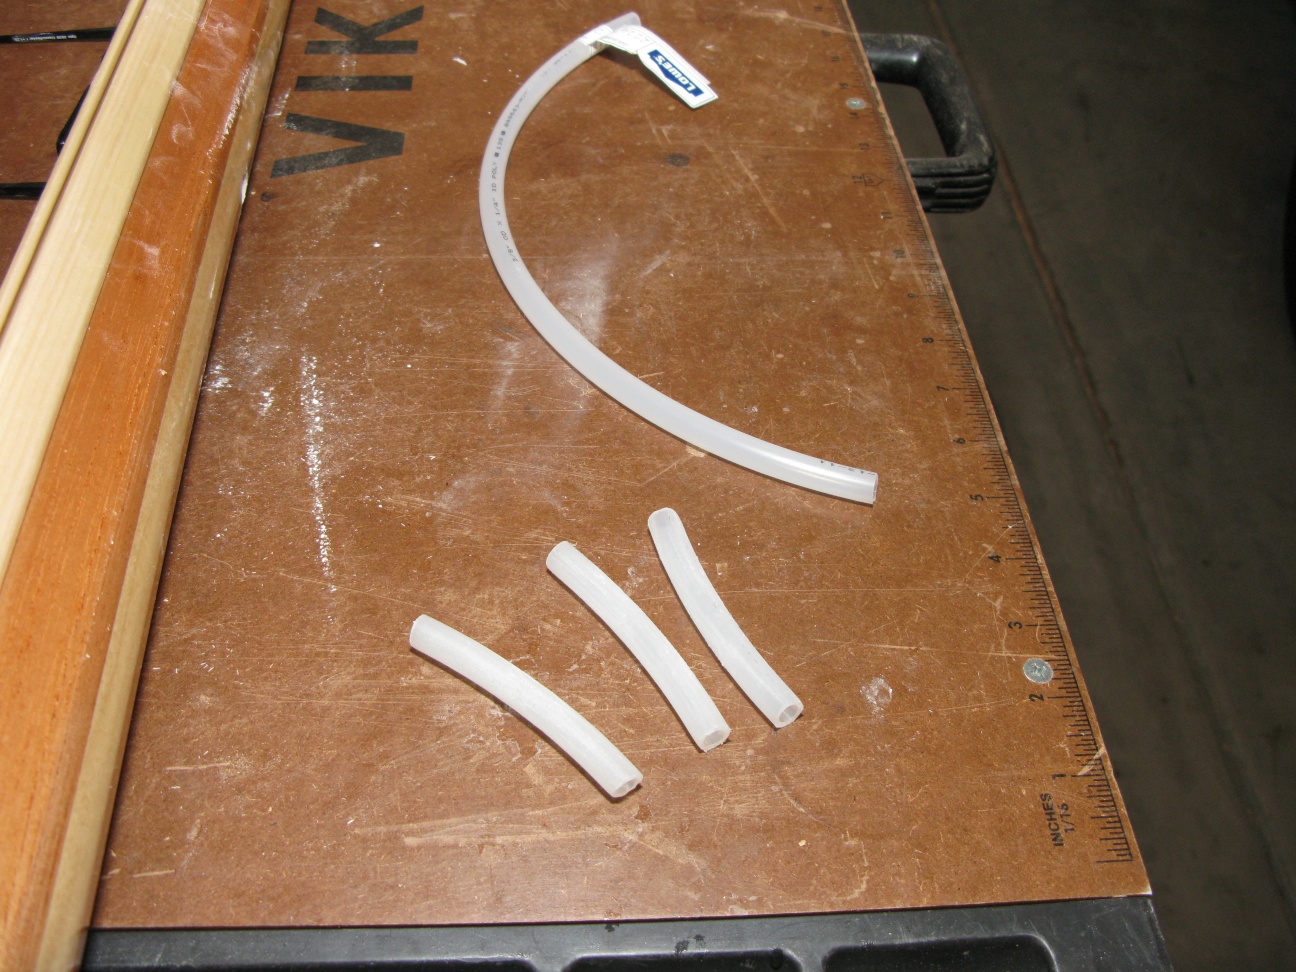
A trip to Lowes took care of buying the stainless steel bolts that I will needed for attaching the shrouds to the mast, the mast sleeve retaining bolt and also the mast retaining bolt. I ended up going with a 1/4" bolt which I based on the diameter of the holes of the hardware. I also bought some 3/8" OD / 1/4" ID plastic hose to act as the sleeve.


As luck would have it while I was drilling the holes in the mast I found out that I complete missed the cedar solid core section where the lower shrouds attach. And to add insult to injury I also found out that the solid section where the spinnaker attaches to on the upper mast was installed in the wrong spot since I forgot to account the length of the spigot when I located it and it ended up being 100 mm below where it needed to be!

That's not supposed to be hollow!

So I decided to drop a quick email to Dudley to ask for help. He suggested installing a 1/2" hardwood dowel wrapped with fiberglass to act as a compression post.

So another trip to Lowes to buy a 1/2" poplar dowel. I also needed to figure out how I was going to drill out my 3/8" holes to 1/2" without majorly messing up the wood. After a lot of wandering around in the isle I decided to go with a uni-bit to start the hole and use a forsner bit to finish it. The trick was to find a forsner bit that would drill a 9/16" hole which was the approximate dimension of the dowel once I wrapped a layer of fiberglass on to it (Not a popular dimension to say the least!). That took a special trip to a specialty woodworking supply store!


I had some 2" wide fiberglass tape left over from the construction of the hull so I went ahead and wetted it out.


And wrapped it around the dowel.


Once cut to size I ran it through the drill press and drilled a 1/4 inch hole through it.


Followed by epoxying it into the hole that I drilled in the mast.


While I did that I also installed the thumb cleats on the mast that I somehow missed the 1st time!

Finished Product


Next steps will be to sand both pieces of the mast and apply varnish - I am so looking forward to that!


Sunday, January 1, 2012

Varnishing the Boom & Bow Sprit

Over the past couple of weeks I have been working on the final finish on both the boom and the bowsprit. I must admit that historically I have always been a bigger fan of building portion of wood working than the finishing. For whatever reason I always seem to be challenged with the final finishing process whether is runs, brush marks in the finish, or even worse - fisheyes!

My experience with the spar varnish seems to be par for the course. I ended up putting 6 coats of varnish with a fair amount of sanding in between to get the finish to be half way presentable. I came across all kinds of issues of which all boil down to one thing: You must put the correct amount of varnish onto the spar - too little and you get ugly brush marks / too much and you get runs. Good times! I also went with the semi gloss finish. In retrospect I should have gone with the gloss - I'm sure I'll have to re-finish these sometime in the future - I will take care of it then!

Boom & Bowsprit after the final coat of varnish


Next on the list is to tackle the mast pieces. Although before I finish them I will get the holes drilled and lined for both the top mast holder and the pin at the base.