Paper Jet 14

Paper Jet 14
Hull#001 Built by Dudley Dix

Sunday, April 24, 2011

Making Sawdust

This weekend I turned these planks of Cedar and Poplar (Not the boat!):


Into:


Plus:


Using:

And:


Holy Cow! What a lot of cutting, thickness planing and emptying out the shop vac! I filled half of my trash can with the sawdust from both of these operations!

For the most part everything went smoothly with the exception of my 12' piece of poplar that I had purchased at Home Depot. Just as I finished ripping the portion I was going to use for the boom I noticed a massive horizontal curve in the plank. I'm pretty certain it was not that crooked when I bought it, therefore, all I can think off is with the weather heating up the board just warped in the garage. As I was debating on weather I was going to use it, I started running it through the thickness planer. During this operation I noticed that this board had a ton of small knots that where chipping out real bad. I took this as a bad omen and decided to call it quits on this board and go back to Home Depot for a new one! (I imagine that all the knots in this structural piece of wood would spell troubles later on). The new piece is definitely a nicer piece of wood, and I'm sure I'll find some other use for the other piece on some future project. Other than that I was surprised how close everything came out with regards to the fact that I had little to no excess on the Cedar. Looks like my careful planning on how I was going to cut the lumber paid off!

Now I have a neat stack ready for routing the birdsmouth and scarfing the pieces of the mast together.

Next steps is to glue up the inside cores for the mast, boom and bowsprit, a little routing, and scarfing and It will be time to put these thing together!

Sunday, April 17, 2011

Spar Support

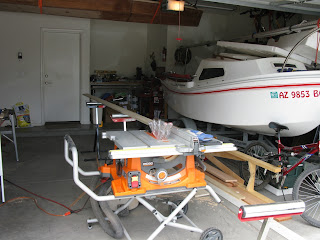
Did not make a whole lot of visible progress on the spars this weekend due to a couple of factors. Firstly I decided to replace my table saw in order to get something a little more professional that I could attach feather boards etc. My portable Ryobi saw did an ok job but was very basic without any mitre tracks (It had a sliding tray instead) but this new RIDGID will definitely make things a lot easier when dealing with lumber that is 12' long! - It has all the bells and whistles! So that took some time set up and make sure that everything was adjusted correctly.

I also decided to do some careful planning on how I was going to rip the planks in order to minimize waste and mistakes, which also took some time.

The one visible item that did get done was the support for constructing the spar. I decided to recycle some 8' long MDF shelving that I had ripped out of our laundry room when I installed the laundry room cabinets at the start of this project and that I have been tripping over the last year or so. I ripped it into four 3" wide strips and screwed them together to make the support beam. I was reluctant to use 2x4's for a few reasons - firstly it is super tough to find a 2 x 4 that is anywhere near straight. Secondly with summer coming the 2x4 might be straight when you bring it home, but who knows how long it will stay that way! And lets face it - it's always great when you can re-use something that you already have!

As you can see it turned our pretty good!

MDF Spar Support

Next steps will be to cut the kerfs and attach the supports.

PS My wife has her parking spot back!!!

Saturday, April 16, 2011

Living on the Ceiling

This AM took the clamps off the spinnaker support beam, gave it a light sanding and called it good!

Assembly Complete!


The boat is now back to "Living on the Ceiling" awaiting completion of the spars! (Curious to how many people recognize that song title!)

Living on the Ceiling!

Friday, April 15, 2011

Milestone Achieved!

Today marks a major milestone in the construction process: I have officially finished the hull/deck assembly. All that is left to do on the hull is to sand it, fill it, epoxy it, prime it and paint it! Cool!!! (Of course there is the task of adding all of the deck hardware.... but that doesn't count!).

Basically over the past few days I have finished the spinnaker guide beam and installed it. First step was to cut the grooves in the side of the hull that it would fit into. The instructions suggested I use a saw to cut kerfs that I would later clean up with a chisel. I decided that a router would be quicker and easier so I measured the depth needed for the slot and clamped a piece of scrap wood to the router so it would not go any deeper than that. It worked very well!

Router Jig for cutting slots - Looks ungainly but it worked!

I then took the time to sharpen up one of my chisels and used it to clean up the work I had done with the router.


I finished off by cutting the beam to size  and also making the knee joint for the port side! (Which took 3 different attempts - don't ask me why!)


Today I attached the router back onto the router table and rounded the beam off, being careful to stop prior to hitting the knee joint and also before it hit the portion that would fit inside the slot in the side of the hull. I finished off by epoxying everything into place.


I also took the time and effort to give the cross deck structure a good sanding in order to get rid of all the excess epoxy that squeezed out during the deck doubler installation process and to round off all of the edges.

Tomorrow I will release the clamps, give it a light sanding and put the hull back onto the roof of my garage - time to go make some spars!

Monday, April 11, 2011

Spinnaker Guide Beam part 2

After letting the laminated beam set up for three days I finally unclamped the whole thing off the bow. Interestingly enough the whole thing sprung up a little once unclamped! I used the miter saw to chop off some of the excess and then ran it through the joiner to clean up the extra epoxy and even everything up. I also kept a small portion of the extra laminated beam which I will use for the triangle knee joint that will be required on the forward port side.


I also took the opportunity to do a little filleting. I went ahead an filleted both mast steps and the bowsprit support.


I also decided to fillet the deck doublers for a couple of reasons. Firstly to smooth out the transition from the deck to the doubler, and secondly (and the main reason) to hide some of the extra epoxy that had seeped out during the epoxying process that I had not noticed and cleaned up due to having a whole bunch of stuff on top of them to weight them down!


It should look pretty good after all is done.

Next steps will be to cut the rabbits into the gunwale, finish the beam and epoxy it in place.

Sunday, April 10, 2011

Spinnaker Guide Beam and other things

When I got off work on Friday afternoon I stopped by the lumber yard and purchased $250 worth of cedar and poplar planks in order to get ready for the next project: The Spars! I also ordered some more thickened epoxy glue from System 3 since I was about out, along with three self mixing tubes of the stuff for the mast project! My though on the self mixing tubes is that even though the stuff is pretty expensive, it will make a tough job a lot easier since summer is coming and the pot life on the epoxy gets a lot shorter! I also ordered the slow hardener for the regular epoxy for the same reasons!


Once I the plans unloaded from the truck the next step was to trim the excess off the bow rub rail and to sand it to shape. Dudley's dimension of 32 mm wide did not work out due to the fact that the rub rails on the gunwales are also 32mm and are sloping downward at an angle relative to the bow transom, therefore, keeping them at the same dimension would leave a fairly visible portion of the bottom part exposed. Therefore I made it wide enough to cover the bottom of the gunwales rub rail. Once I started trimming the sides I also noticed that the bottom of the bow transom needed to be shaped to match the angle of the gunwale rub rails if not there would be a very noticeable angle point at that location. Anyhow, not as straightforward as it first appears but nothing too complicated either.


Once Finished with that I ran the router with a 1/4 round bit along the whole entire rub rail to smooth it out. Next step is to build the spinnaker guide beam.

For this next step I had some leftover cedar and mahogany that I cut down to size and then ran it through the thickness planer. The plans call for it to be 100% cedar, but I figured the lamination of the mahogany & cedar would be a little bit more interesting. I cut and located the temporary center support as indicated and laminated everything together making sure to cover everything with wax paper. I did notice that in order for everything to lay down correctly you really had to have the clamps on the forward side of the hull on the rub rail. When I first put it together one was forward the other was aft, and it was not laying down correctly. Luckily I caught it prior to everything setting up.


I'm letting the whole thing sit for a few days for a couple of reasons: Firstly there was a fair amount of resistant for the wood to bend at that angle and the whole thing is under some tension. Secondly after last weekends heat spell we ended up with a cold rainy weekend where the temperatures did not peak over 55 degrees. So I'm thinking two solid days of setup time is necessary to make sure the epoxy does not creep when I let the whole thing go!

Next steps will be to trim it size, cut the rabbits in the side of the hull, sand it, epoxy it and voila! Assembly finished on the hull and time to more onto the spars!

Thursday, April 7, 2011

All pieces attached!

Sunday morning I removed all the clamps from the cross member. Amazing the stiffness that the doublers added to the structure!

Next step was to epoxy the mast step, front rub rail, and bowsprit support:

The inside portion of the rub rail ended up taking a little time to trim and shape - It has multiple angle to deal with in order to fit perfect! I also rounded off the edges with the router - I figured it would be easier to do this prior to installing it! The mast step is both epoxied and screwed in place so I went ahead and drilled and countersunk the holes in the mast steps.


I located the center of both the forward & aft mast steps and pre-drilled a hole to allow the mast step to be screwed in place while the epoxy sets up.

Aft Mast Step Screwed & Epoxied in Place


I also pre-marked the location for the bowsprit support in order to make sure everything was square.

Bowsprit Support attached


Once everything was set up I mixed up a batch of epoxy and glued everything in place. As you can see I used a square to make sure the bowsprit support was square with the deck.

Forward Mast Step in place also


This marks a small mile stone since I have now officially attached all of the pre-cutt plywood pieces to the boat!

Only one thing left to do to the hull prior to finishing the "assembly" is to fillet the bowsprit support into place and laminate and attach the spinnaker guide beam!

Tomorrow I go to the lumber yard to start picking up the wood for the Spars - should be interesting!


Sunday, April 3, 2011

Holy Clamps Batman!

I started this weekend by filleting the cross deck in place. Temperatures in Phoenix spiked on Friday to a whopping 100 degrees which made the pot life on the filleting material shorten up considerable. I let it set up overnight and started Saturday morning by test fitting and trimming the cross deck doublers.

Test fitting the cross deck doublers

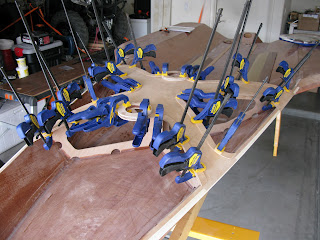
As you can see by the picture it took quite a few clamps to get the different pieces situated on the top of the cross deck to figure out how it fit and what needed to be trimmed. I also made the move to cut the hole in the bow transom for the spinnaker pole. Always fun drilling a big hole in the front of your boat! I used a 65mm hole saw that I special ordered from Lowes to do the job.


Once trimmed I proceeded to test fit the cross deck doublers in their ultimate position underneath the cross deck to make sure that the epoxy process would go smoothly. I also took the opportunity to sand down the epoxy fillets under the cross deck prior to epoxying the doublers into place.

Once I started epoxying the doublers in place it became an "all clamps on deck" exercise. I ended up using every single clamp I own, plus an additional 5 from my neighbor to get everything to come out nice and tight. It ended up looking like a clamp porcupine!


Next steps will be to install the mast steps, the rub rail on the inside/outside of the bow transom, the spinnaker pole support, and the spinnaker guide beam and the assembly portion of the hull will be done!