Paper Jet 14

Paper Jet 14
Hull#001 Built by Dudley Dix

Tuesday, March 30, 2010

Adding Stringers

I spent the weekend putting three coats of epoxy on the front half of the bottom panels. Interesting enough there was a small section of the epoxy coat that did not harden - must have had a minor mixing issue towards the bottom of the cup! A rag and some acetone took care of cleaning up the area. I'll put an extra coat on it once I have the hull laced up. I must admit that I am still learning the ins and outs of epoxy!

I went ahead and clamped some straight edges to both the rear transom and all the bulkheads to take out some of the twist/warp that some of the plywood bulkheads had. This should assure that everything is straight prior to installing the stringers. As you can see all those clamps come in really handy!I cleaned up the scarf joints on the stringers, and also the stringer slots on each bulkhead in order to make sure that they would sit flush and glued the stringers in place.

The stringers have a considerable twist once they meet up with the backbone at the bow of the boat, therefore, I decided no to glue them at this moment and to let this set up for a couple of days and then on Thursday go back at it and glue the stringers to the bow of the boat. It should give the epoxy enough time to set up and take the strain of the twisting.

Last but not least I glued the Bow doubler to the Bow piece.

Looks like tomorrow and Thursday will have little to no progress as I wait for everything to set up good!

On another note - The plans that I ordered from Eric Henseval in France for an Aviateur 5.70m came in! I am glad that I am building this boat ahead of the Aviateur since Dudley's instructions are very comprehensive, and the Aviateur's plans assume you know your way around boat building!

Friday, March 26, 2010

Squaring up the frame

Finally finished putting the 3 coats of epoxy on the dagger board case and the front part of the boat, along with finishing up the joining of the bottom and side panels. I ended up having to destructively remove the rail on the front portion of the frame due to a slight issue with runny epoxy! Yes, it ran into the cracks and effectively glued the front frame to the temporary rail! I figured it would be easier to remove it now and build a new frame than to try and do it once the hull was together. Luckily $1.90 at Home Deport, and about 2 1/2 hours of my time fixed the whole thing!

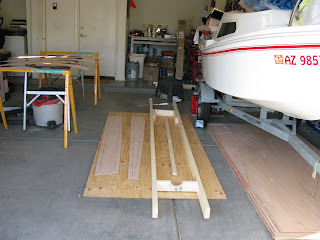
Today I tied the boat down the building frame. I spent a fair amount of time straightening things up although there is still a slight curve in the rear portion of the frame where the plywood is a little warped. It should come out once I start lacing the backbone with the bottom panels. I also noticed that the edge of a couple of the bulkheads are also warped. Not 100% certain what to do about that. When I install the stringers I'll make sure to measure everything and mark the 400mm mar on each stringer so I can check the spacing and make sure everything up to that point is at least true.

I also glued the dagger board casing to the frame. It's amazing how goopy the glue gets. I went ahead and put a couple of pieces of scrap plywood as Dudley suggests in his plans to prevent the whole thing from sliding down!

As you can see I also re-did the scarf joints on the stringers. I wasn't happy the way it turned out the first time and decided to cut them off and re-do them. Looks like the should turn out ok this time. Next step will be look at all the stringer cut-outs on the bulkheads and file them down so that everything fits as it is supposed to. I suspect I am going to have to wait a couple of days to let the scarf joints set up prior to attaching them to the hull. Lot's of starts and stops when working with epoxy!

Thursday, March 18, 2010

Joining the hull panels


Yesterday I extracted out the hull bottom and side panels and pretty much stopped due to an unexpected request for a proposal at work. I decided that the pursuit of new work was more important than working on the boat (After all, work is what gives me the ability to support my hobbies and go sailing!) so I called it quits.

Today I cleaned up all the pieces and prepped them for joining. Since the boat is 13.5' and the plywood is only 8' long each panel comes in two parts. The process of joining them entails sanding a shallow grove on each side of the joint and laying epoxy and fiberglass on each side to join them. The designer suggested using a plane or a belt sander, I decided to go with a basic palm sander with 80 grit - I figured there would be less chances of a "Woops" moment!

I went ahead and mixed up some of the laminating epoxy and coated all the joints prior to laying the fiberglass tape in. I laid wax paper on top of each joint and used the squeege to work the epoxy into the tape. I also went ahead and gave the first of three coats to the inside of the dagger board casing. Looks like that is pretty much all I can do for the time being so I am calling it quits. I guess all those paint cans that we keep in the garage are good for something!

Off to do some sailing this weekend in a big boat! (41' Beneteau) Boat project is done for the week!

Tuesday, March 16, 2010

Day 3

Got off work today at around 1:00 and decided to put some more time in on the boat! Today I cranked out the thickness planer and got my stringer stock to 12mm. Cathy helped me rip 6 of these 12mm x 12mm stringers from an 8' piece. Took a little bit of thinking to get the 6:1 angle for the scarf sorted out on the miter saw but as you can see by the picture I figured it out!

I went ahead and glued up the dagger board rails to the backbone and also glued up the strips to the dagger board casing. The rear transom is also glued on at this time.

Had quite the interesting experience with the epoxy this evening. I learned that you cannot let the stuff sit too long in the container before it heats up and turns to crap. Looks like you are better off applying the epoxy to all the parts and then going back and fitting. I spent too much time messing around with the dagger board casings so that when I got around to the other items I wanted to glue up, the whole thing was toast and had to mix another batch. Live and Learn!

Monday, March 15, 2010

Day 2


I feel like I made some progress today! Last night before going to bed I had my first experience using the epoxy glue. Pretty viscous stuff! Went ahead and glued the Transom doubler to the Transom. All those bottles of full epoxy are good for something!

Today I finished cutting, trimming and sanding all the pieces. I also finished the frame and front backbone support. I have all the different bulkheads fit into their respect slots on the backbone. I also extracted the dagger board panels, and corresponding support frames. It's beginning to look like a boat! It's worth noting that the laser on the Miter saw comes in handy when you are trying to figure out non standard angles. Just fire up the saw compare the angle on the laser to the one drawn. Release the trigger, adjust and try again. Once the line lines up with what you drew on the lumber you are good to go!

This whole project reminds me of building the balsa wood airplanes when I was a kid.. except on a bigger scale! Off to work tomorrow - might get something gluing done tomorrow PM

Sunday, March 14, 2010

Let's Start This Project!


Finally started the project today!

I built the frame from 2x4's and went ahead and linked them together. I will create the cross braces out of the back sheet of plywood that shipped with the kit. I decided to forgo the wooden saw horses since I already have metal ones. I guess I will not be screwing these down! I may add some wood strips to the bottom of the frame to prevent it from sliding around on the horses - We will see if they are needed!.

I had to spend some quality time with the backbone support piece and the joiner in order to get a somewhat straight surface.

I also extracted the frames, backbone, transom, transom doubler and dagger board casings from the plywood sheets. Based on the thinness I used a small panel saw vs. a Jig Saw. As you can see the bottom of Manana makes a nice storage area for the balance of the plywood sheets!

Next up is cleaning up all the pieces I extracted including removing the inner portions. Also I need to cut the kerf in the backbone support.

Monday, March 8, 2010

Plywood is here!


Took off work early today to run by the post office. Just as I pulled up to the driveway of my house I received a call from my assistant telling me that there was plywood being delivered to the office with my name on it! Promptly ran back to work and picked up the nicely package sheets. Yes this stack of plywood sheets will eventually look like a boat!

Sunday, March 7, 2010


Received plans from Dudley Dix today! I also heard from Sam @ Third Coast Composite - Kit is on its way. Should be here Monday or Tuesday!

Tuesday, March 2, 2010

I get a boat project, Cathy gets laundry cabinets!


It's always good politics to make the wife happy before the start of a major project that might infringe on whats considered the "Holy Grail" in our house hold - Her garage spot! She picked out unfinished cabinets, so we sanded the fronts and doors down and are currently applying polyurethane to them. They should be done just in time to get started on the boat!

It is Sail # 40!


The System Three Epoxy kit arrived today from the manufacturer. Theoretically those 3 boxes contain all the fiberglass, resin, fairing compound, etc to finish the boat!

Dudley also emailed me to notify that my plans are shipping tomorrow and that I have officially been assigned sail # 40!